It did not turn out that way at all.
Once upon a time, we bought this wee little house. It had wee little gardens. I planted stuff. It grew. Sort of. I didn't do a great job. Because here's the thing that they don't tell you- you have to work at it all the fucking time.
The really pretty flowers, the ones that look like, you know, flowers, only last for one year. Those are your annuals. You have to plant new ones every year. Every year.
 |
| This is NOT my house. |
The method I employ is the I-don't-want-to-spend-a-thousand-dollars-every-spring-on-flowers method. Also known as the "Is this a perennial?" method.
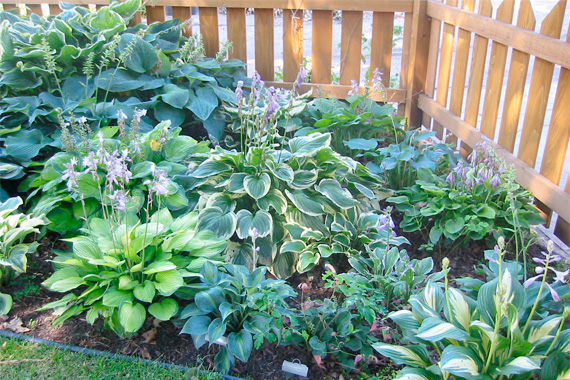 |
| These are hostas. I don't love them, but they are perennials, they are large, and they take up space. |
After the wee house, we moved to South Carolina. We lived in an apartment, no gardening, life was good. But we had the itch of the American dream, and bought a house. Gardening ensued. I tried to grow some zucchini, but it didn't work out. I grew a wisteria in a ridiculously successful way and it smelled amazing. I wanted to put rock down as my sort of mulch, but as it turns out, rocks hold heat, and that bakes your plants. So I bought some plants that were good in the desert, and those worked out for me. I asked a lot of questions at a lot of places that sold plants.
Then we moved to Virginia, and rented a house. It was a new house, it was a rental, there was no landscaping to keep up. Laziness ruled the day.
Then we bought our current house, the money pit with an amazing view. Seriously, it's an amazing view. Anyway, the money pit has a yard to end all yards. It's a damn big yard. Luckily, I do not mow. That is Agent N's job as of last year. He gets paid when he does it.
There is so much landscaping. Some is in the sun. Some is part sun. Some is shady. If you are new to the gardening game, you should know that different plants grow in different amounts of sun. Some grow in shade. Some need a lot of sun. Some like both.
Then there's the vegetable garden. I like zucchini and yellow squash. Also basil. Year one- I thought I'd grow some. I grew some, I was moderately successful. My garden was kind of full of weeds, though. I'm not much for weeding. The landscaping looked like shit. I didn't even know what I was doing, and I didn't know what was there before, so I let stuff grow to figure out if it was good. We put down so much mulch. Mulch is heavy. It's supposed to cut back on the weeds, but be warned, it does not do the whole job. You will still have to pull weeds.
 |
| I use this to weed- it helps you get the roots out. |
I spent a large portion of the fall cutting back bushes that ran away with themselves, and digging out an enormous amount of some sort of plant that grew taller than me. That's not a joke.
Year two, the plant that was taller than me came back, but there was slightly less of it. We put down more mulch. We rented a tiller for the garden. I grew a ton of zucchini, squash, some beans, and a few tomatoes. I tried to grow spinach, but it never grew. Not even a little bit. I successfully split some hostas. I planted some groundcover that didn't do so well. I was kind of pissed. I had put it a shit ton (technical term) of work that did not pay off. Because motherfucking gardening never ends. I still spend the fall cutting back bushes, but at least this time I knew it was going to happen.
I had this vision of sitting back on the deck with a sweet tea and admiring my work. NOPE.
Year three (present day): This year, I bought a hand tiller for $30 compared to last year's $70 rental. How hard could it be? 2 hours of tilling the garden by hand and I was sweating more than when I work out. But it's already paid for itself because it's cheaper, I guess. I planted spinach this year because it's a superfood and I eat it every day. It's actually growing. The groundcover I planted last year is already growing, despite the winter of doom. The hostas need to be split again. The bushes already need to be cut back. I may or may not have killed the holly bush by cutting it too far back, but those leaves hurt like a son of a bitch so go ahead and die, asshole bush. I dug out the ugly rosebush in front of the house. The hydrangea I planted last year is coming back in a big way. The weeds bigger than me are slightly less this year. I'm pretty sure I won't get rid of them completely without a flamethrower.
All that, done. It's not even June.
The stupid garden, it's growing on me (see what I did there?).


